Living in a tiny apartment doesn’t mean you have to give up fresh herbs, microgreens, or leafy greens year-round. Seriously—your windowsill, bookshelf nook, or even a humble kitchen counter can become a mini indoor garden. The trick is using a hydroponic setup that’s small, smart, and beginner-friendly.
In this guide, I’ll walk you through how to set up a small apartment hydroponic garden for beginners, step by step. We’ll cover choosing the right space, picking a system that won’t feel like it’s taking over your living room, selecting plants that actually thrive indoors, and keeping them happy without a degree in plant biology. Think of this as your apartment-friendly green-thumb blueprint—minus the guesswork.
By the end, you’ll know how to turn even the tiniest corner of your apartment into a productive, lush little garden. And trust me, there’s nothing quite like snipping fresh basil for your spaghetti right from your own countertop setup.
Section 2: Choose the Right Space & Lighting
Finding the Perfect Spot Space is the ultimate luxury in a small apartment, right? You’re not going to have a 10-foot-wide grow room (unless your living room doubles as a jungle). But here’s the good news: a well-planned 2–4 ft² nook can produce a surprisingly generous harvest. Think of that sunny corner by your kitchen window, a bookshelf shelf cleared for a tray system, or even a tiny table in the living room.
When picking a spot, keep these in mind:
Power nearby: Most hydroponic systems need a pump or LED lights, so being near an outlet is ideal.
Space for growth: Your plants will grow, so make sure there’s some breathing room above them. A tiny avocado seedling won’t be a problem, but those microgreens and lettuce leaves like their personal space.
Ventilation & temperature: Small spaces can heat up fast, especially if you’re using lights. Keep things comfortable—around 65–75 °F is perfect for most herbs and leafy greens.
Lighting Options for Small Apartments If your spot gets lots of natural light, you’re in luck—sunlight is free! But realistically, most apartments have shady corners, so an LED grow light is usually your best friend. Full-spectrum LEDs (5000–6500 K) mimic sunlight and give your plants everything they need to thrive.
A few practical tips:
Timer it: Set lights for about 14–16 hours on, 8–10 hours off. Yes, even plants need a nap.
Adjustable height: As plants grow, you might need to raise or lower the light. Don’t let your microgreens get too cozy right under a lamp that’s inches away—they’ll get crispy.
Watch the heat: LEDs are cooler than old-school HPS lights, but in a small apartment, heat can still build up. Therefore, keep a fan handy or open a window when needed.
Example: I once crammed a 2-tier vertical system on a bookshelf in my studio apartment. The lights were adjustable, and the top tier got slightly more sunlight from the window. My basil thrived, the lettuce loved the LEDs, and my cat mostly ignored the whole thing. Win-win.
💡 Key Takeaways for Section 2
Pick a compact, accessible corner with power and room to grow.
Natural light helps, but a small LED grow light makes all the difference.
Keep plants comfy and avoid overheating your tiny indoor jungle.
Section 3: Select the System That Fits Your Apartment
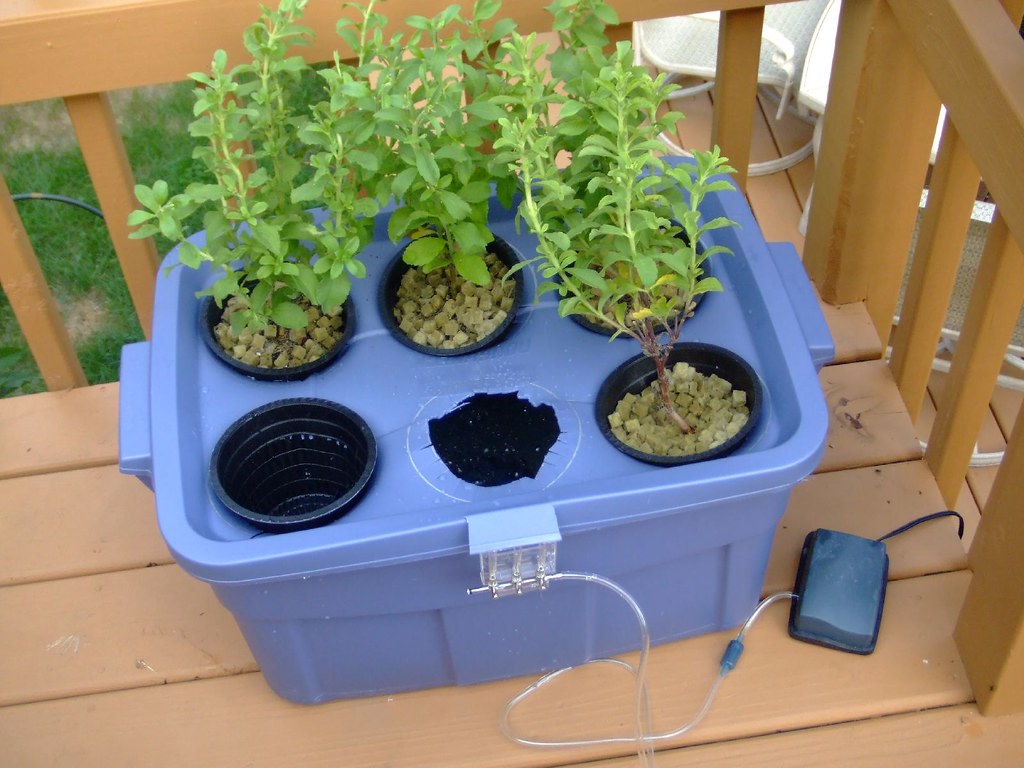
Not all hydroponic systems are created equal—especially when space is at a premium. The good news? You don’t need a sprawling setup to grow a thriving mini-garden. It’s all about matching the system to your space, plants, and lifestyle.
A. Countertop & Tabletop Systems
These are perfect for beginners or anyone short on floor space.
Small, self-contained kits (think AeroGarden or Click & Grow) fit nicely on a kitchen counter or bookshelf.
Pick a system that fits your space, plants, and attention span.
Section 4: Pick Your Plants for Success
Not all plants are created equal, especially when you’re working with a tiny apartment garden. The goal here is to choose fast-growing, low-maintenance plants that will reward your efforts without demanding constant attention.
Herbs – Quick Wins
Basil, Mint, Parsley, Cilantro – classic choices that thrive indoors.
Why they’re great: Most herbs grow quickly, don’t need huge root systems, and are perfect for small containers.
Fun tip: Basil grows faster if you pinch off the top leaves regularly—yes, it’s basically plant haircuts.
Leafy Greens – Quick Harvests
Lettuce, Spinach, Arugula, Kale
Pros: Fast-growing, easy to harvest, and forgiving if you forget a day of maintenance.
Scenario: Even a small 2-tier system can yield enough lettuce for sandwiches or salads each week.
Microgreens – Tiny Powerhouses
Sunflower, Radish, Pea Shoots, Broccoli
Why microgreens: They grow in just 1–2 weeks, don’t need a deep container, and pack serious flavor.
Bonus: You can rotate trays quickly, which keeps your indoor garden productive and your kitchen colorful.
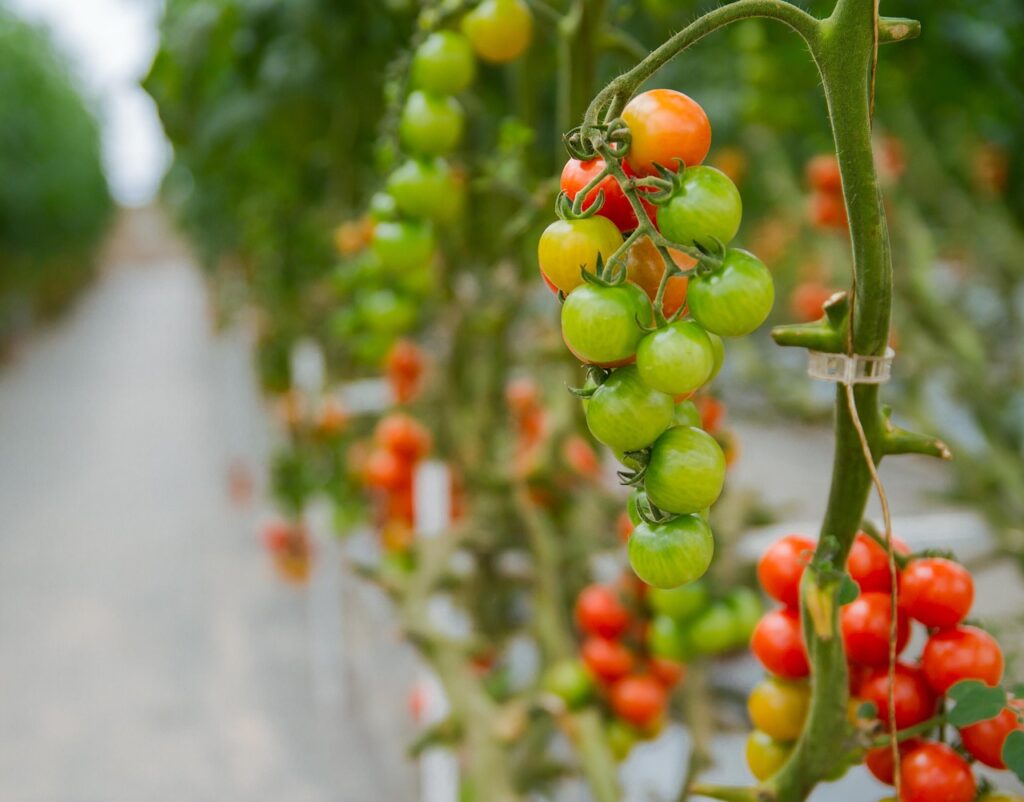
Small Fruiting Plants (Optional)
Cherry tomatoes, small peppers
These require more light and attention but are doable in LED-lit vertical towers or well-placed windowsills.
Tip: Start with one small plant and see how it goes before adding more. Nothing worse than a frustrated tomato that never ripens.
Planting Considerations for Small Spaces
Roots matter – pick plants with compact root systems; they’ll thrive in shallow containers or net pots.
Spacing – even in small setups, give leaves room to grow. Crowded plants can stunt growth and invite disease.
Rotation – start with a few trays or pots and rotate crops to keep the system productive year-round.
💡 Key Takeaways for Section 4
Herbs and microgreens = beginner-friendly, fast-growing, minimal fuss.
Leafy greens = forgiving and satisfying, especially in multi-tier setups.
Small fruiting plants = fun experiment for when you’re ready to level up.
Always consider root depth, spacing, and rotation for long-term success.
Section 5: Nutrient & Water Management
Managing the water and nutrients is the part where many beginners pause and think, “Okay, I’m growing plants… but now what?” Don’t worry — you’ve got this. In hydroponics, water is the soil, and the nutrients dissolved in it are everything your plants need to grow. Getting this balance right is key to healthy, happy plants, even in a small apartment setup.
Why Water and Nutrients Matter Think of your hydroponic system like a plant’s all-you-can-eat buffet. Instead of soil slowly delivering nutrients, your plants’ roots sit in water that is the soil. If the nutrient mix is off or the water quality isn’t ideal, your plants will show it quickly. Too much nutrient can burn leaf tips, while too little can leave stems limp and leaves pale. Hard or mineral-heavy water can also throw off the balance, making your system work harder than it should.
What Your Nutrient Solution Should Contain Your solution should have macronutrients like nitrogen, phosphorus, and potassium, which drive leaf growth, root development, and overall health. Secondary nutrients like calcium, magnesium, and sulfur strengthen cell walls and chlorophyll production. Even small amounts of micronutrients—iron, manganese, zinc, boron, copper—are important; deficiencies show up fast indoors. For beginners focusing on herbs, leafy greens, and microgreens, a ready-made hydroponic nutrient solution is usually the simplest choice. It saves guesswork and keeps your plants thriving.
Mixing and Managing the Solution Start with clean water. If your tap water is hard or chlorinated, letting it sit or using a filter will prevent stress on your plants. Pour the water into your reservoir first, then add the nutrients, mixing carefully to distribute everything evenly. If your nutrient formula has multiple parts, follow the instructions for the proper order. Make sure the solution circulates so roots don’t encounter concentrated pockets.
Check pH regularly. Most herbs and leafy greens thrive in slightly acidic water, around 5.5 to 6.5. Outside this range, some nutrients become unavailable, slowing growth. Monitoring solution strength with an EC or PPM meter is optional for small setups, but keeping a close eye on your plants and topping off with fresh water usually works well. Over time, you’ll develop a feel for how your plants respond and how often to refresh the solution.
Apartment-Friendly Monitoring Routine Keep an eye on water levels and glance at your plants daily. Look for drooping leaves, odd colors, or spots. Refresh pH every few days if needed. Change the nutrient solution every week or two, cleaning the reservoir and any system parts to prevent algae or mineral buildup. If you rotate crops or switch plant types, you may need to tweak nutrients slightly. Your plants will often signal what they need—yellowing leaves, crispy edges, or stunted growth are all cues.
Troubleshooting Common Issues Some hiccups are normal. Burnt tips often indicate too strong a nutrient mix or pH issue. Pale or limp leaves can signal a nutrient shortage or imbalance. White crust on your system points to mineral buildup—flush with fresh water. Algae growth usually means the reservoir is getting light exposure—cover it or move it to a darker spot. Don’t stress; these are easy fixes, and every small apartment grower goes through them.
Key Takeaways Your nutrient solution is the engine of your hydroponic system. Keep it balanced, maintain a simple routine, and your plants will reward you with healthy growth. Treat the system as part of your apartment environment: efficient, manageable, and friendly to your lifestyle.
Section 6: Planting, Maintenance & Harvesting
Planting in a small apartment hydroponic system might feel intimidating at first, but it’s actually straightforward once you get started. The goal is simple: get your seeds or seedlings into your system, care for them consistently, and enjoy a steady harvest without turning it into a full-time job.
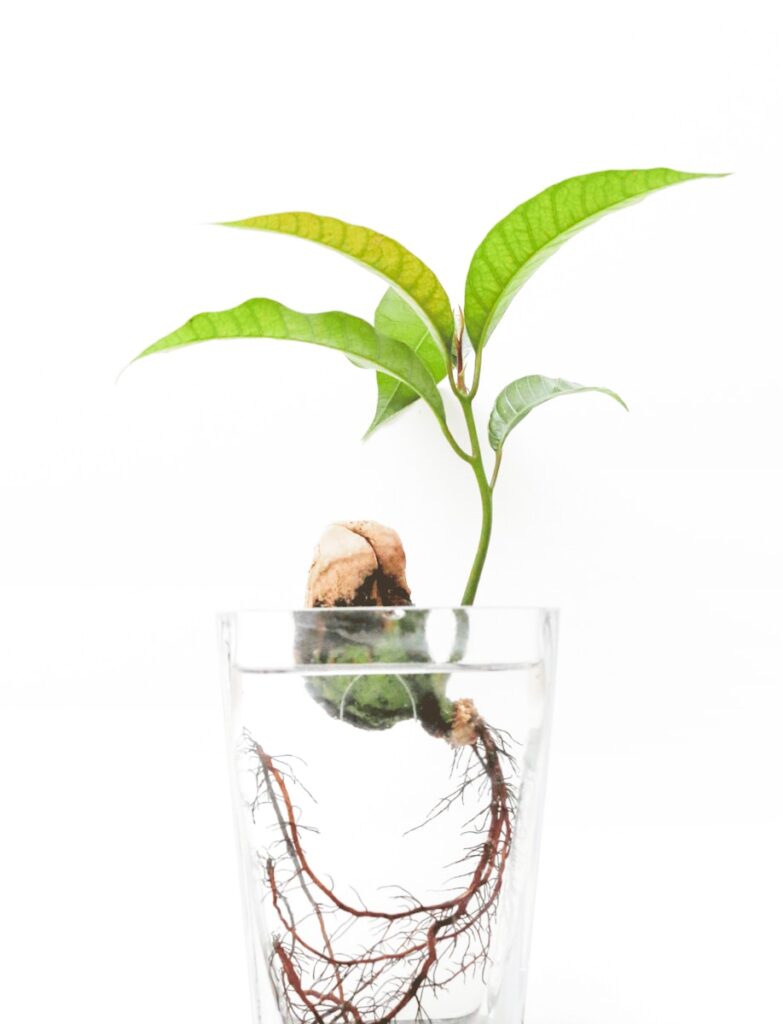
Planting Begin with healthy seeds or seedlings. If you’re using net pots or small containers, fill them with your chosen growing medium—rockwool, coco coir, or hemp mats work well. Place the seeds gently and make sure they are in good contact with the medium. There’s a little thrill in seeing the first shoots pop up on your kitchen counter—it’s like a tiny green miracle happening right in your apartment.
Maintenance Check water levels daily, especially in smaller reservoirs where evaporation happens fast. Additionally Make sure your nutrient solution is circulating and take a quick look at your plants to spot early signs of stress. Adjust the light height if your plants start stretching toward the window or away from LEDs. Pinching or trimming herbs encourages bushier growth and keeps plants manageable in limited spaces. Every week or two, give your system a quick rinse to prevent algae or mineral buildup—it doesn’t take long, but it makes a huge difference.
Harvesting Timing depends on the type of plants you’re growing. Microgreens are ready in one to two weeks, leafy greens in four to six weeks, and herbs like basil or mint once they reach a few inches tall. Use scissors or small shears to snip gently, leaving enough growth so the plant can continue producing. One of the joys of apartment hydroponics is that you can maintain a continuous rotation: harvest a tray of microgreens, let the next batch grow, and keep your kitchen stocked and vibrant.
Tips for Success Don’t be afraid to experiment. Every apartment, system, and light setup behaves slightly differently. Keep notes, try small adjustments, and pay attention to your plants’ responses. Even minor tweaks—raising the light a few inches, rotating trays, or adjusting nutrients slightly—can dramatically improve growth.
Remember, this is more than just growing plants—it’s creating a mini ecosystem that thrives in your home. With a little attention and observation, your small apartment can become a surprisingly productive indoor garden.
Conclusion & Next Steps
Congratulations!
You’ve now got the blueprint for growing fresh herbs, microgreens, and leafy greens right in your apartment. From choosing the perfect spot and lighting, to selecting a system that fits your space, picking the right plants, and managing nutrients and water—every piece of the puzzle is in place.
The next step is simple: start small, learn your system, and enjoy the process. Try one countertop kit, a DIY tote, or a compact vertical tower. Observe how your plants respond, adjust as needed, and build confidence as you go. Keep experimenting with new plants, rotating crops, and refining your nutrient routine. Each success, even a tiny sprout on your windowsill, is a win worth celebrating.
Once you feel comfortable, you can explore expanding your setup or trying more advanced techniques. Adding additional kits, towers, or even smart sensors can make your garden more productive and help you maximize your harvest without extra stress. And when you’re ready, you can naturally introduce affiliate products to your readers, showing them the exact systems, lights, or nutrient solutions that worked for you.
Remember, indoor hydroponics is as much about creativity and observation as it is about technique. Embrace the learning curve, enjoy the process, and relish those first snips of fresh basil or handfuls of vibrant microgreens. Your apartment may be small, but your garden—and your satisfaction—can be enormous.
Additional: Common Questions & Answers
Q: What’s the best indoor hydroponic system for a small apartment?
A: For an apartment setting, compact countertop systems or tabletop kits tend to be the most practical. They require minimal floor space, often integrate the light and tank into one unit, and are beginner‑friendly. These systems let you start with herbs or microgreens without turning your room into a greenhouse. As you gain experience, you might upgrade to a vertical tower or DIY tote system, but starting compact keeps things manageable and stress‑free.
Q: How much does it cost to start an apartment hydroponic garden?
A: The cost varies a lot depending on size, system type, and lighting. For a very basic countertop kit you might spend under $100 (including seeds, nutrients, and a simple light). As you scale up – for example to vertical systems with more plants and stronger lighting – costs go up. It’s worth viewing this as a long‑term hobby: once set up, the ongoing costs (nutrients, electricity, water) are usually modest compared to buying fresh greens year‑round.
Q: How often do I need to change the nutrient solution in a small hydroponic setup?
A: In a small apartment system growing herbs or leafy greens, plan to completely change or refresh the nutrient solution every one to two weeks. In between full changes, you’ll likely top‑off with fresh water as the reservoir level drops. Keeping pH and nutrient concentration steady is more important than changing on a rigid schedule, but frequent check‑ups prevent stability issues before plants begin to suffer.
Q: What are the most common mistakes apartment hydroponic beginners make?
A: One big mistake is underestimating lighting needs. Even if you use natural light, many apartment spots don’t give enough for hydroponics, so a proper LED grow fixture is key. Another frequent issue is neglecting pH and nutrient strength — indoor systems tend to show problems quickly if levels drift. A third is poor site selection: placing the setup near a heater, drafty window, or clogged corner can cause temperature or airflow issues. Recognising these before they derail your plants helps you avoid frustration.
Q: Can I grow herbs and microgreens in an apartment hydroponic system year‑round?
A: Absolutely — one of the biggest advantages of indoor hydroponics is the ability to bypass seasons. Herbs like basil, mint, and parsley, and microgreens like radish shoots or pea shoots, grow fast and don’t require deep root systems. With stable light, nutrients, and a clean setup, you can harvest fresh greens all year. Just keep an eye on your grow light schedule, water/nutrient health, and give the plants a little TLC when needed.
Q: Do I need to monitor pH and budget for meters in a small apartment hydroponic setup?
A: Ideally yes, but it doesn’t have to be elaborate. A basic pH meter or testing strips are a good investment and can make a big difference in preventing nutrient lock‑out. As for EC/PPM meters (which measure nutrient strength), those are helpful but optional for very small beginner setups. If you choose to skip the high‑tech gear early, you’ll still want to focus on regular visual checks of plant health, water clarity, and reservoir condition, and plan to upgrade your monitoring tools when you scale up.


")


Leave a Reply